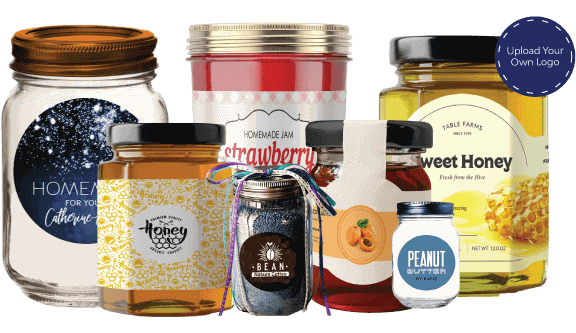
Creating Custom Mason Jar Labels with a chalkboard design adds a charming and functional touch to your storage solutions. Chalkboard labels offer flexibility for labeling and re-labeling, making them ideal for organizing pantry items, craft supplies, or even gifts. By following these steps, you can produce high-quality labels that not only look stylish but also help you keep everything neatly organized.
Materials Needed
Firstly, gather your materials. You will need chalkboard adhesive paper or chalkboard vinyl, a cutting tool, a ruler, chalk markers, and a clean cloth. Additionally, having a computer and printer can be useful if you plan to print any designs or text. Furthermore, you might consider having a laminating machine for added durability.
Choosing the Right Material
Selecting the proper material is crucial for the longevity and appearance of your labels. Chalkboard adhesive paper is straightforward to work with and adheres easily to most surfaces. On the other hand, chalkboard vinyl is more durable and can be a better choice if you need something that withstands frequent handling.
For instance, adhesive paper is ideal for simple applications where you can cut and stick the label directly onto the jar. Conversely, vinyl might be better suited for labels that will be exposed to moisture or heavy use.
Preparing the Labels
Measuring and Cutting
To start, measure the area on your mason jar where you want the label to be placed. Using a ruler and a pencil, mark out the dimensions on your chalkboard material. Subsequently, use a cutting tool to carefully cut out the labels. Ensure the labels are slightly larger than the marked area to avoid gaps when applying.
Once cut, you may want to round the edges slightly to give a more polished look. In addition, you could use a corner punch tool to achieve this effect.
Adding Design Elements
Next, consider if you want to add any decorative elements to your labels. You might use a computer to design and print custom graphics, or simply use chalk markers to write directly onto the labels. Also, you can incorporate decorative elements such as borders or patterns to enhance the visual appeal.
To illustrate, if you are labeling jars for a holiday party, you could add festive designs around the edges. Alternatively, simple lines or shapes might be sufficient for a more minimalistic look.
Applying the Labels
Clean the Surface
Before applying your labels, ensure the surface of the mason jars is clean and dry. Wiping the jars with a damp cloth can remove any dust or residue that might interfere with adhesion. Then, dry the jars thoroughly before proceeding.
Moreover, applying labels to a clean surface will help prevent bubbles and ensure a smooth application.
Attaching the Labels
When you are ready, carefully peel off the backing from your label and apply it to the jar. Align it precisely to avoid misplacement. Press firmly to ensure full contact and smooth out any air bubbles using a cloth or your fingers.
In the event of any wrinkles or bubbles, gently peel the label off and reapply it, smoothing out the imperfections as you go.
Maintenance and Care
Cleaning and Reusing
keep your labels looking fresh, and clean them with a damp or light wet cloth if they become soiled. Make sure to avoid abrasive cleaners or scrubbing, which can damage the chalkboard surface. Moreover, chalkboard labels are easily erasable, so you can update the information as needed without removing the label from the jar.
For example, if you want to change the contents of the jar, simply wipe the label clean and re-write the new information. This feature makes chalkboard labels particularly versatile for various uses.
Longevity Tips
To extend the life of your labels, consider applying a clear laminate over them. This additional layer provides extra protection against moisture and wear. Additionally, storing jars in a dry, cool place will help prevent the labels from becoming damaged over time.
Using these tips ensures your chalkboard labels remain in good condition and continue to serve their purpose effectively.
Conclusion
Making Custom Mason Jar Labels with a chalkboard design is a practical and stylish way to organize your items efficiently. By choosing the right materials, measuring accurately, and applying your labels carefully, you can achieve a professional and durable result. Furthermore, properly maintaining your labels ensures they will look good and function well over an extended period.
In conclusion, incorporating chalkboard labels into your storage solutions not only enhances organization but also adds a unique and personalized touch to your containers. Canadian Custom Packaging Companies offer a wide range of options for those looking to create high-quality, functional labels. Whether you choose adhesive paper or durable vinyl, these labels can be an excellent and practical addition to your home organization toolkit.
