Concrete driveways are a staple of American homes, offering durability and strength. Over time, however, exposure to the elements, heavy traffic, and natural wear and tear can leave a driveway looking cracked, faded, or even crumbling. While it might seem like a daunting task to restore a concrete driveway, the good news is that with the right tools, techniques, and a little patience, you can repair your driveway and make it look brand new again.
In this article, we’ll walk you through the essential steps and tips for repairing and rejuvenating your concrete driveway, making it an attractive, functional space for years to come.
How to Repair a Concrete Driveway
1. Assessing the Damage
Before you start any repairs, it’s essential to assess the extent of the damage. Concrete driveways can experience various types of issues, including:
- Cracks: These may be hairline or more substantial, depending on the cause of damage.
- Pitting and Spalling: Small holes or craters on the surface, often caused by weather conditions like freezing and thawing.
- Stains: Oil, rust, or other substances may leave unsightly stains on the concrete.
- Uneven Surfaces: Areas where the concrete has sunk, creating depressions or uneven slopes.
Take a walk around your driveway and note any problem areas. This will help you determine which materials and methods you’ll need to repair the surface properly.
2. Gather the Necessary Tools and Materials
To get started, make sure you have all the necessary tools and materials for the job. Depending on the size and type of repairs, you’ll need the following:
- Concrete repair caulk or crack filler (for small cracks)
- Concrete resurfacer (for larger cracks and worn surfaces)
- Concrete patching compound (for pitting and spalling)
- Wire brush or broom (for cleaning the surface)
- Pressure washer (for deep cleaning)
- Trowel or float (for smoothing resurfacing material)
- Sealant (for finishing and protection)
- Rubber gloves, safety goggles, and a dust mask (for protection)
These materials can typically be found at most hardware stores or home improvement centers.
3. Cleaning the Driveway Surface
Before applying any repair materials, cleaning the concrete surface is a crucial step. Removing dirt, debris, and any oils will ensure that the repair materials bond properly.
- Pressure Washing: If you have access to a pressure washer, use it to clean the surface thoroughly. Aim for a setting of about 3,000 PSI (pounds per square inch) to remove dirt, grime, and any loose particles from the driveway.
- Scrubbing with a Wire Brush: For smaller stains or debris in hard-to-reach areas, use a wire brush to scrub away any surface buildup. A broom can also help to sweep away dirt.
- Dealing with Stains: For oil or rust stains, use a concrete cleaner or a mixture of baking soda and water to scrub the affected areas.
Once the surface is clean, allow it to dry completely before proceeding with repairs.
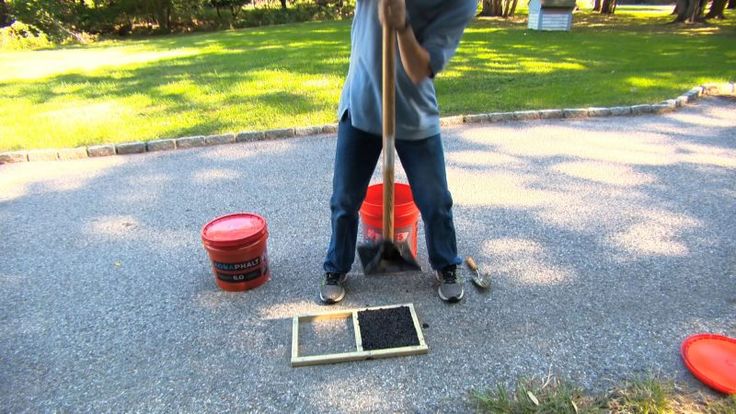
4. Repairing Cracks and Holes
Cracks in your driveway can occur for many reasons, including shifting ground, water damage, and freeze-thaw cycles. Fortunately, repairing cracks is a relatively straightforward process.
- Small Cracks: For hairline cracks or smaller fissures (less than 1/2 inch wide), use a concrete crack filler or caulk. Apply the filler directly into the crack using a caulk gun, smoothing it out with a putty knife or trowel. Allow it to cure as per the manufacturer’s instructions.
- Larger Cracks: For more significant cracks, use a concrete patching compound. You may need to enlarge the crack slightly with a hammer and chisel to help the filler bond better. Once cleaned, fill the crack with the patching compound and smooth it over using a trowel. Allow it to set for the recommended time.
- Deep Pits and Spalling: If the surface of your driveway has pitting or spalling, fill the holes with a concrete resurfacer or patching compound. Use a trowel to apply the compound, pressing it firmly into the hole. Smooth the surface so that it is level with the surrounding area.
5. Resurfacing the Driveway
If your driveway has widespread damage or looks worn out, a resurfacing treatment might be the best option. Concrete resurfacer is a thin layer of concrete that bonds to the existing driveway surface, giving it a fresh, smooth appearance.
To resurface your driveway:
- Mix the Resurfacer: Follow the manufacturer’s instructions for mixing the resurfacer. You’ll typically mix the compound with water until it reaches a pourable, thick consistency.
- Apply the Resurfacer: Using a large squeegee or trowel, apply the resurfacer to the entire driveway, working in small sections. Spread the mixture evenly across the surface, making sure to fill in any gaps and cover the entire area. Work quickly, as resurfacer can set fast.
- Smooth the Surface: After applying, use a broom or float to smooth the surface and create a textured finish. This will improve traction and help the surface blend in with the surrounding concrete.
Allow the resurfacer to cure for at least 24 hours before walking on the surface and 72 hours before driving on it.
6. Sealing the Driveway
Sealing your driveway after repairs is an essential step in prolonging its lifespan and maintaining its new appearance. A concrete sealant helps protect the surface from stains, water damage, and the harsh effects of UV exposure.
- Choose the Right Sealant: There are two main types of concrete sealers: acrylic and penetrating. Acrylic sealers form a protective film on top of the concrete, giving it a glossy finish. Penetrating sealers seep into the concrete, providing long-lasting protection without altering the surface appearance. Choose the one that best suits your needs.
- Apply the Sealer: Use a paint roller or sprayer to apply the sealant evenly across the driveway. Be sure to follow the manufacturer’s instructions on how many coats to apply and the drying time between coats.
A well-applied sealant can protect your driveway from stains, keep the surface looking new, and enhance its resistance to weathering.
7. Regular Maintenance to Keep It Looking New
Once you’ve completed your repairs and sealed your driveway, regular maintenance is key to keeping it looking like new. Follow these simple tips to extend the life of your concrete driveway:
- Clean Regularly: Sweep or hose off your driveway regularly to remove dirt, leaves, and debris. For tougher stains, use a concrete cleaner.
- Seal Every Few Years: Reseal your driveway every 2-3 years to maintain its protective layer.
- Repair Minor Issues Promptly: Address small cracks and damage as soon as you notice them to prevent them from becoming larger problems.
Final Thoughts
Repairing a concrete driveway is a rewarding DIY project that can add both curb appeal and longevity to your home. By assessing the damage, using the right materials, and following a few simple steps, you can restore your driveway to its former glory without breaking the bank. With proper care and maintenance, your driveway can continue to provide reliable service while looking beautiful for many years.
Whether you’re dealing with cracks, stains, or general wear, taking the time to properly repair and maintain your concrete driveway will ensure that it stays functional, attractive, and safe for both your family and guests.